Showing posts with label recipe. Show all posts

Saturday, December 5, 2009

A touch of El Diablo

My last post on Chips and Salsa mentioned an old chain restaurant that is no longer in business, Chi Chi's. The brand lives on in supermarkets where you can purchase salsa, taco seasoning, and corn fritter mix, but when it was a restaurant chain, it was among Sandra's and my favorite places despite the fact that it was a chain.

What was special about Chi Chi's? The taste. I may have fell in love with Mexican food at El Torito, but Chi Chi's always had a fresher taste. I believe that they used cilantro more liberally than in any other place I ate at when I first started on my Mexican kick, and cilantro has this very "fresh" taste that enhances salsa, rice, and most Mexican dishes. This fresh taste made me feel that every dish they made was made solely for me. It's a wonderful way to run a restaurant--freshness is probably a quality that will keep you coming back, and it worked for me with Chi Chi's.

I remember one of the first times that Sandra and I visited Chi Chi's. I believe it was in Sunrise, Florida, in Broward Country up route 27 (this was before I-75 and I-595 were created, and Rt. 84 was "Alligator Alley"). The two of us made quick work of their chips and salsa and we asked the waiter for more. He cheerfully brought us out some more warm chips, but then admonished us: "You should watch out. They expand when they hit your stomach!" Sandra and I were both amused by this, and we've repeated it to each other (and our kids) many, many times whenever we eat chips and salsa.

Anyway, as I mentioned in my other article, I grew up thinking that Mexican food was hot. I've learned since that while you can find some spicy Mexican dishes, you are more likely to find dishes that don't have too much spiciness at all. In fact, corn and cheese really defines the cuisine, with spiciness a distant third.

After I moved from Miami to New England, I found a Chi Chi's was never too far away. The closest was a twenty minute drive, which was close enough for a special meal for Sandra and me.

I remember one day when I was visiting Chi Chi's, they had some new items on their menu, advertised to be pretty spicy. They were touted as Diablo (Spanish for "Devil"), but of the selections, nothing really appealed to me. At the time, I favored Chi Chi's beef chimichangas, and didn't want to order anything that was too different from that. Luckily, I noticed that they also had Diablo Sauce, which could be ordered separately, so I did. It came out with my chimichanga in a small bowl. The sauce was deliciously spicy--a warm, green sauce with meat in it. After a taste, I knew that they had something special, and I dumped most of it over my chimichangas and--voila!--a very good dish became ever better! I left a bit of sauce so that I could dip my chips into it.

From that day, I had a new favorite dish, and until the Chi Chi's near us closed, the Beef Chimichangas with a side order of Diablo Sauce was what I ordered every time I visited the place.

Alas, the place is no more. They closed the restaurants near me quite a few years ago, and the entire chain has since gone out of the restaurant business.

Last spring, I was feeling nostalgic about Chi Chi's and did a Google search to find out whatever became of them. In doing so, I found a Chi Chi's Copycat Recipes site, which I linked in my previous article. Two recipes linked on that sight intrigued me: Baked Chicken Chimichanga Chi Chi's Copycat Recipe and Chi Chi's Diablo Sauce Copycat Recipe. I copied those recipes into my personal recipe collection and did a Chi Chi's Mexican Dinner night with Sandra, including some freshly fried tortilla chips and Chi Chi's Garden Salsa (see previous post). Both Sandra and I enjoyed the trip down memory lane, although Sandra has never been as fond of the Diablo Sauce as I was; the recipe they gave would have made too much for the two of us.

I include the recipes for the Diablo sauce and the chimicangas below.


Chi-Chi's Diablo Sauce


Source:#131271 (C) 2009 Recipezaar. All Rights Reserved.
Cook Time:35 min
Prep Time:10 min
Yield:Serves 4
Catalogued:21-Apr-2009

Ingredients

1 lb ground pork

2/3 cup chopped white onion

1 (4 ounce) can diced green chilies, with juice

10 tablespoons la victoria green chili salsa

jalapeno (x-tra hot)

3 cups water

1 (1 ¼ ounce) package Ortega taco seasoning (Hot & Spicey)

2 tablespoons cumin

½ teaspoon salt

2 tablespoons cornstarch

¼ cup water


Brown ground pork, onions.

Add diced chilis, La Victoria salsa.

Add 3 cups water.

Add Ortega taco seasoning.

Add ½ tsp salt.

add 2 tbsp cumin.

Combine 2 tbsp corn starch and ¼ cup water and add too sauce.

Continue to simmer till thickened.


Baked Chicken Chimichangas like Chi-Chi's®


Source:Copycat Recipe Site
Prep Time:0:45
Yield:Serves : 8
Catalogued:21-Apr-2009

Ingredients

1 sm. onion - chopped

3 cloves garlic - minced

1 Tbls vegetable oil OR butter OR margarine

2 cups salsa

1 ½ tsp chili powder

½ tsp ground cumin

½ tsp ground cinnamon

1 pinch salt

2 ½ cups cooked, shredded chicken OR turkey

8 12 flour tortillas

1 cup canned refried beans

non-stick cooking spray - as needed


In a large saucepan over medium-high heat, sauté onion and garlic in oil/butter until tender; stir in salsa, chili powder, cumin, cinnamon, and salt; fold in chicken/turkey; remove from heat and set aside.

Working with one tortilla at a time, spoon 2 Tablespoons of beans down the center of each tortilla; top with a scant ½ cup of the chicken mixture.

Fold the top and bottom of the tortillas toward the center, then roll up the sides.

Secure with wooden toothpicks or pieces of spaghetti noodles if necessary.

Place chimichangas in a 13" X 9" X 2" baking pan, seam side down.

Spray all sides of the chimichangas with a light coating of cooking spray.

Bake in a 450 degree oven for 20-25 minutes, or until golden brown and crisp, turning after 10 minutes.

Serve with sour cream and guacamole.


Bon Appetit!

Tuesday, December 1, 2009

Chips and Salsa

I believe that I've mentioned in the past that I was nearly twenty years old before I truly encountered Mexican cuisine. Before that, I had tacos, having learned to love them at the Jack in the Box fast food chain in my home town of Brentwood, NY. From that humble beginning, I slowly tested the waters, first with Taco Bell in Centereach (I went there with Sandra on a date; I was a big spender back then!), and then some other chains.

I admit that I was a bit naive when it came to Mexican food at that point in my life. All that I really knew about it was that it was hot. After all, there were many instances in cartoons where somebody would have Mexican food and then would get all red with smoke coming out the cartoon character's nose, ears, and other orifices. There were many jokes about Mexican food as well, like "Mexican weather report: Chile Today, Hot Tamale!"

My first taste of Mexican food was at a chain restaurant called El Torito in South Miami. This restaurant was in a lovely outdoor mall called "The Falls." For a person that wasn't that familiar with the cuisine, I was immediately in food heaven. There were all these things that I've vaguely heard about before, but now they were right there in front of me on the menu: Tacos, enchiladas, burritos... you name it! Oh yeah... Margaritas as well!

I frequented that restaurant quite a bit, although I didn't explore much beyond the typical tacos and enchilads (all beef, of course!). I also tried other Mexican restaurants, and being in Miami, most of them were pretty decent.

One thing common to nearly every Mexican restaurant I visited were the complimentary corn chips and salsa that were placed on the table, usually accompanied with "salsa," which is the local word for "sauce." The salsa was made with tomatoes, chiles, onions, cilantro, and other wonderful things. This simple starter became yet another reason I would fall in love with the Mexican cuisine.

Back in the early 1980s, you could get tortilla chips in the grocery store. I remember Fritos, of course, and later came Doritos. I think Old El Paso had box of chips called Nachips. However, these highly salted and mass produced chips didn't compare to the fresh chips that were made at the restaurants. Eventually, I learned how to take soft corn tortillas, cut them into wedges, and fry them to make decent chips myself. (That's the basic recipe; cut, fry, drain, serve!)

What set most restaurants apart--their signature, as it were--was their salsa. Some made it incredibly spicy, some were chunkier than others, some were almost a strained liquid. I liked a lot of them, disliked a few. One of my earliest favorite salsas came from a restaurant chain, of all places. Chi Chis had a salsa that just seemed fresher than the others. I eventually found out that the fresh taste was how I was interpreting the taste of cilantro, which apparently was a bit more predominant in Chi Chi's salsa than a lot of others. Chi Chis is no longer a restaurant chain, and since moving up north, I've found a few Mexican restaurants that I enjoy--usually all of them have a pretty good chips and salsa to start, although I've see a couple of restaurants start to charge for this. (Please, let's hope this is not a sign of things to come!!!)

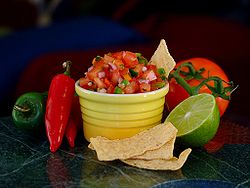
Anyway, I found that I'm not the only person to miss Chi Chi's recipes. I've found a fan page for the place which has a recipe or two, and links to other recipes on the web. It was from this page that I found a pretty good copycat recipe for Chi Chi's garden salsa, which I present below:


Chi Chi's Fresh Garden Salsa Recipe Clone


Source:Chi Chis Copycat Recipes
Catalogued:21-Apr-2009

Ingredients

2 pounds fresh roma tomatoes

1 bunch of fresh cilantro

1 bunch green onions

1 onion

2 limes or ¼ cup of lime juice

2 serrano peppers (If you substitute jalapenos, add about 5 drops of Tabasco sauce)

3 garlic cloves

3 tablespoons cumin

1 tablespoon each: salt, garlic powder, oregano, chili powder

1 teaspoon sugar

1 teaspoon fresh ground black pepper

Chop up the tomatoes, both onions, and cilantro. Put almost half of the tomatoes into a blender with the lime juice, peppers, garlic, and rest of the spices. Blend until thick, but not watery. Add this mixture to the rest of the ingredients in a serving bowl. Put in the refrigerator for a few hours to allow the flavors to develop.


Bon Appetit!

Wednesday, February 25, 2009

Celebrating Mardi Gras

When I went to the butcher shop this weekend, I was a bit disappointed that there wasn't any andouille sausage; I had really wanted to make some chicken and shrimp gumbo for Mardi Gras this week.

Instead, I found a nice package of four pork chops. I immediately thought about a meal I made before the kids were born. I believe I saw the recipe in James Beard's "American Cookery" cookbook, but I know that I adapted it to my own and Sandra's tastes.

Remembering that I liked that recipe, I decided to try to re-create it once again, this time doing it straight from memory. I had all the necessary ingredients, and asked Sandra if she had any packages of the "yellow rice" we both like (Carolina's Yellow Rice, packaged just right for the two of us with a hint of saffron).

This gave me a great opportunity to use my (relatively) new Calphalon pot, a 4.5 quart "Slow Poke" Saucier that I got for Christmas. It was the perfect size to saute four pork chops without crowding the bottom.

Sandra helped by making the Saffron Rice, substituting the water in the package directions with a can of chicken broth (for additional flavor).

The meal took about 45 minutes to accomplish (including preparation and cooking), and we each had a glass of Pinot Grigio to accompany the meal.

I won't claim that this meal was the next best thing to a pot of gumbo or to being in New Orleans watching the revelry, but it was a nice, relaxing meal for the two of us.

Would we do it again? Well, if I can get andouille sausage next year, I might just make a gumbo, but if I can't find them, this might good enough for the two of us!


Creole Pork Chops with Rice


Yield:2 servings (2 pork chops per serving)
Catalogued:24-Feb-2009

Pork Chops

4 medium sized pork chops

Extra-virgin olive oil

One half of a large, sweet onion, slice thin

Flour (for coating pork chops)

2 tsp Cajun seasoning

1 tsp ground cumin

1 tsp ground thyme

1 dash Accent flavoring (MSG-optional)

1 10 oz can Tomatoes and Green Chiles (Rotel)

¼ cup red wine (dry or sweet)


Rice

1 package Carolina Yellow Rice

1 tbs butter

1 15 oz can chicken broth


On a stove, put 2 tbs olive oil into a large sauce pan (4.5 quart) on medium-high heat. Add sliced onions and saute for about 5 minutes until they get translucent.

Meanwhile, combine flour, Cajun seasoning, cumin, thyme, and Accent (if using) into a 1 quart Ziploc bag, and mix thoroughly. One by one, add a pork chop into the bag, seal, and then shake to coat the chops with the flour mixture. Set aside.

Remove the onions from the large saute pan and add floured pork chops, adding additional olive oil as needed. Saute over medium-high heat for 10 minutes a side until nicely browned on both sides (do not burn).

Prepare the yellow rice by bringing the can of broth and 1 tablespoon margarine to a boil in a medium (2 quart) saucepan. Stir in rice mix. Cover, reduce heat and simmer for 20 minutes.

When pork chops are all browned, add the can of tomatoes and green chiles, the onions that you have set aside, and red wine. Mix thoroughly together, moving the pork chops so they are setting on top of the tomato mixture. Cover pan, and simmer at medium-high heat until the sauce starts to bubble, and then reduce heat to medium. After ten minutes, turn the pork chops over and mix the sauce again, adding water or additional wine if the sauce starts to reduce too much. Lower heat to medium-low and allow the mixture to set for an additional 10 minutes.

To serve, fluff rice lightly with fork and then spoon rice onto two plates. Next, add two pork chops per pate, dividing the sauce over the four chops.

Serve with a dry white wine (Pinot Grigio or Chardonnay).


Bon Appetit!

Monday, September 8, 2008

Shepherd's Pie

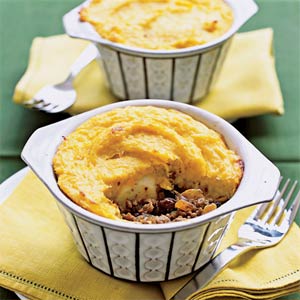
Shepherds PieI've always liked the idea of Shepherd's Pie. In it's most basic form, it's a simple stew to make. I've had this in restaurants, and I've made it myself. Sandra likes it as well... up to a point. I'll explain that in a bit.

For the life of me, I cannot remember when I first had Shepherd's Pie. I do not remember having it at home as we grew up at all, nor do I recall having it when I was living in Miami.

I do know that when I was working in the North End of Boston (between 1987 and 1992), I not only knew what Shepherd's Pie was, but I had it on a semi-regular basis at some of the restaurants nearby.

To this day, the best version of the dish that I've had was from The Black Rose restaurant and pub on State Street near Quincy Market in Boston. I went there on a regular basis and had Shepherd's Pie there more often than not.

The dish isn't particularly difficult to figure out. That's lucky for me, since this was before The Food Network or being able to Google a recipe on the Internet was possible, and I do not believe that I had a recipe for this dish in my cookbooks at home. What it tasted to me was ground lamb, seasoned with Worcestershire sauce, mixed with onions and vegetables (peas, carrots), with a nice helping of mashed potatoes on top. Almost always, it was served as if it were baked in the bowl from which it was served. It wasn't particularly expensive, and was tasty and made a great lunch meal. (Meat, potatoes, and even a few vegetables, all in one dish!)

Sandra and I have a nice set of covered bowls that we used many times for making onion soup. The first time I made Shepherd's Pie at home, I knew that I just HAD to use those bowls! I've seen presentations of Shepherd's Pie since, usually made in a large casserole dish with portions cut out with a spatula, and to me, this is just no way to make the dish. It's not that much more difficult to cook it in the bowl that you will be serving it in, as long as the bowl is oven safe, of course.

Anyway, I didn't have too much trouble putting the recipe together. As I said, the ingredients were easy to detect from tasting it. I just sautéed the ground lamb and added freshly chopped onions (you don't want your vegetables too prominent in this dish), and continued cooking until the meat was done and the onions translucent. I may have added some chopped carrots that first time--I'm not really sure. I know I added some frozen peas near the end, to let them thaw out.

Ground lamb can get greasy, so it was necessary to drain the sautée pan once the meat was cooked. After that, I added some spices to taste: Worcestershire sauce (about two tablespoons), some onion powder, and some garlic salt. I tasted as I went along, and I was confident that I found the Black Rose's recipe. (As I said, it wasn't difficult.)

I then portioned the meat and vegetable mixture into the bowls, and then spooned some instant mashed potatoes (yes, I really used instant!) on top. I baked the bowls in a 350°F oven, and cooked it for about 10-15 minutes. Afterward, I turned the heat up in the oven and switched to Broil to give the potatoes a bit of a brownish tinge--about 4-5 minutes.

When the meal was served, I was ecstatic. The meat was bubbling underneath the dome of mashed potatoes. In fact, when I made a hole in the potatoes to get to the meat, a lot of steam came out of it! The taste was right on the spot!

Sandra, on the other hand, didn't like it much. The problem was that she doesn't like lamb at all. Not grilled, not cubed for Irish stew, and (apparently) not ground. The lamb was the deal breaker for her. In deference to her, in all my subsequent efforts in making this dish, I've been using ground beef. I think that ground beef lessens the "authenticity" (at least to the Black Rose taste I came to love), but it is perfectly workable, and I've come to enjoy the beef variety. Sandra does, too.

I never jotted down my recipe from that first time, since I managed to get it right just by using my taste buds. Since then, I've found a pretty good recipe by Rachael Ray on her Thirty Minute Meals show, which I now use as a guide. She goes into the details of mashing the potatoes (and still does the meal in thirty minutes!), which I don't do personally—Sandra is the one that usually mashes the potatoes. I still make the recipe to taste, but I use her ingredient list as a guide to make sure I don't forget anything. (Old age can do that to a guy!)

Last week, I asked Sandra if she'd like Shepherd's Pie. I got the idea from watching a show on Irish Pubs on the Canadian version of the Food Network. (Interestingly enough, The Black Rose was featured prominently on that show!) She thought it would be a great idea, but she didn't know how much mashed potatoes to make (she doesn't like instant mashed potatoes much, and doesn't mind making them from scratch for a meal).

I went shopping and got the requisite ground beef. Market Basket also had some Angus "pub burgers" (large, ⅓ pound burgers) and I bought them for a Salisbury Steak meal. When I told Sandra of my purchases, we figured it would be a great idea to make the Salisbury Steaks one night, and Sandra would make an extra helping of mashed potatoes. She put them in the refrigerator overnight, and then I used them to spoon over the bowls. It had been a couple of years since I made Shepherd's Pie, but it turns out that I still have the knack!


30 Minute Shepherd's Pie


Source:Rachael Ray—30 Minute Meals—Food Network
Prep Time:15 minutes
Cook Time:25 minutes
Yield:4 servings
Catalogued:17-Dec-2004

Ingredients

2 pounds potatoes, such as russet, peeled and cubed

2 tablespoons sour cream or softened cream cheese

1 large egg yolk

½ cup cream, for a lighter version substitute vegetable or chicken broth

Salt and freshly ground black pepper

1 tablespoon extra-virgin olive oil, 1 turn of the pan

1 ¾ pounds ground beef or ground lamb

1 carrot, peeled and chopped

1 onion, chopped

2 tablespoons butter

2 tablespoons all-purpose flour

1 cup beef stock or broth

2 teaspoons Worcestershire, eyeball it

½ cup frozen peas, a couple of handfuls

1 teaspoon sweet paprika

2 tablespoons chopped fresh parsley leaves


Boil potatoes in salted water until tender, about 12 minutes. Drain potatoes and pour them into a bowl. Combine sour cream, egg yolk and cream. Add the cream mixture into potatoes and mash until potatoes are almost smooth.

While potatoes boil, preheat a large skillet over medium high heat. Add oil to hot pan with beef or lamb. Season meat with salt and pepper. Brown and crumble meat for 3 or 4 minutes. If you are using lamb and the pan is fatty, spoon away some of the drippings. Add chopped carrot and onion to the meat. Cook veggies with meat 5 minutes, stirring frequently. In a second small skillet over medium heat cook butter and flour together 2 minutes. Whisk in broth and Worcestershire sauce. Thicken gravy 1 minute. Add gravy to meat and vegetables. Stir in peas.

Preheat broiler to high. Fill a small rectangular casserole with meat and vegetable mixture. Spoon potatoes over meat evenly. Top potatoes with paprika and broil 6 to 8 inches from the heat until potatoes are evenly browned. Top casserole dish with chopped parsley and serve.


Bon Appetit!

Tuesday, March 25, 2008

Roll Your Owns

One of my family's favorite weekday meals is tacos. Although we use the packaged taco seasonings, we don't use the taco shells that they sell in the Mexican aisle in the supermarket. Instead we have what we've come to call "Roll Your Owns."

The process is simple. First, we brown some ground beef, discarding the extra fat that renders out. We use a wooden spatula to break up the beef into small crumbles as it cooks. Afterward, we add between a half cup and a cup of water and taco seasoning. Actually, we use a combination of one packet taco seasoning, and one packet "salsa mix," which I've found to give the meat a fresher taste than just taco seasoning alone. I've found that if you add too much water, the meat gets very runny; you can fix that up easily by adding a bit of cheese to make the mixture a bit firmer until you get the consistency you want.

As the meat is cooking, the rest of the taco ingredients are prepared. Lettuce is shredded, tomatoes are diced, onions sliced and diced, shredded cheese taken out of the refrigerator. We also add other things, depending on what's on hand: scallions, cilantro, whatever. All these ingredients, as well as the cooked meat, are put onto plates or bowls.

Next, we quickly wash the skillet we used to cook the meat, and then add about an inch or so of vegetable oil. The oil is heated until a drop of water "dances" when added to the pan.

Now, it's time to make the tortillas. We've found that about a dozen corn tortillas makes enough tacos for our family of four, so we usually make sure we have on hand two dozen tortillas in case somebody is hungrier than usual.

We fry the tortillas in the hot oil for varying amounts of time: about a minute for a "soft taco," a couple of minutes for a "medium taco," up to four or five minutes for a "hard taco" (folded) or "tostada" (flat). At our house, the "medium taco" is usually the favorite, with occasional requests for tacos or tostadas. The fact that they are "cooked to order" is why we call them "Roll Your Owns."

Once finished, the tortilla is placed on a plate covered with absorbent paper towel, and then the recipient will fill it with meat and various veggies and cheese, topping with taco sauce.

By the time four tortillas have been prepared, it's time to start again with the first person's second taco, and keep frying until everybody has had their fill.

Usually, at the end, there are still some tortillas, meat, and other ingredients left over. Not to fear! The remaining tortillas are cut into pie wedges (about six pieces per tortilla), and fried to make tortilla chips. Meanwhile, the remaining ingredients are collected into a single bowl to make taco salad. A few chips are crushed to top the salad, and the salad is eaten with the remaining chips.

Yum!

Monday, March 3, 2008

Barguy's Focaccia

I've mentioned Chip Shots Grill and Sports Pub before, and today's blog entry is about one of my favorite sandwiches, which was "invented" at that pub.

I first had focaccia at a restaurant called Houlihan's, which I first visited when they had a restaurant in Quincy Market in Boston. That restaurant has closed and there is another in its place, but one of the sandwiches they had there was a "Brentwood Chicken Grill," which intrigued me because I grew up in Brentwood, NY, and also because the sandwich was served on "focaccia bread." (Note: the chain now has a "Brentwood Chicken Sandwich" which is now served on a whole wheat bun. Pity!)

Focaccia is a bread which is usually seasoned with olive oil, onions, herbs, cheese, etc. There are probably as many variations in how a focaccia is made as there are variations in how pizza is prepared. In Houlihan's case, the sandwich had some cheese, rosemary, and a nice texture. I had this sandwich numerous times, even after Houlihan's in Quincy Market closed--I found a location in Lake Grove, NY, across the street from the Smith Haven Mall on Middle Country Road.

Anyway, at Chip Shots, I saw a number of focaccia sandwiches in their specials list, but never bothered to order them. After all, the idea of teriyaki chicken on a focaccia roll didn't really appeal to me. However, one day, I saw a special focaccia sandwich with the simple name "Roast Beef, Swiss Cheese, and Mushrooms." I ordered the sandwich and was immediately hooked. THIS was a sandwich I really liked! I liked it so much that I came back the very next day to order it again!

When I came back the next week, the specials list changed. I mentioned to one of the owners (Shannon) that the focaccia sandwich I had the previous week was one of the first times I ever came back to Chip Shots solely for the food (I really like the atmosphere and the people there, which is my main reason for frequenting that place). Shannon assured me that I could order that sandwich off the menu, and there would never be a problem. I took her up on that, and it now is one of the only meals I eat there... when I like something, I like it!

Recently, that focaccia sandwich reappeared on the specials list at Chip Shots, only this time it was called "Barguy's Focaccia." The name "Barguy" is one that I used when logging into the NTN trivia games that were once at the pub, and is the wait staff's nickname for me. I was honored; this was the second time a special was named after me!

This past weekend, I happened to notice some focaccia rolls at Hannahford's when doing some grocery shopping. I immediately got the idea to share my favorite sandwich with Sandra. I looked at the price of roast beef, and found it prohibitive--more expensive than some steaks! So, instead of using roast beef, I used shaved steak, which was less than half the price of the roast beef. (Chip Shots once made it as a "steak sandwich" for me when they ran out of roast beef when I ordered it.)

I made the sandwich and omitted the mushrooms for Sandra's sandwich, since she doesn't like them. We sliced up some baby Vidalia onions as well. Sandra loved the sandwich as much as I did. The two of us have now agreed to make this an occasional lunch meal on weekends.

The recipe below is my own adaptation of the Chip Shots recipe. It is the version that I made this past weekend. My sandwich included the mushrooms; Sandra's didn't.


Barguy's Focaccia (Roast Beef, Swiss, Mushrooms)


Source:Chip Shots Grill and Sports Pub
Yield:One sandwich
Catalogued:03-Mar-2008

Ingredients

1 medium sized onion focaccia roll

2-4 slices aged Swiss cheese

1 Tbs butter

1 Tbs Olive oil

¼ small onion, sliced

1 oz sliced mushrooms (canned is fine)

½ lb roast beef (shaved steak will also do)


Preheat oven to 400°F. Slice the focaccia roll into two slices and toast so that the inside gets a bit of color. Keep oven on after you remove the bread, and immediately add the slices of Swiss cheese evenly onto the sandwich halves.

Meanwhile, melt butter and olive oil in a large skillet over medium heat. Add sliced onions and mushrooms to the butter/oil mixture, stirring occasionally until onions are translucent, about five minutes.

Cut roast beef slices in half or quarters, and add to the skillet and cook for another couple minutes until the redness in the beef starts to disappear. If using shaved steak, cook a bit longer until the meat is about medium done. Mix the meat with the onions, mushrooms, and then move to plate lined with absorbent paper.

Add the drained meat, onions, and mushrooms onto the sandwich halves on top of the cheese. Assemble the sandwich, adding toothpicks if necessary to keep the halves together.

Toast in the oven for 3-4 minutes until cheese melts.

Serve immediately.


Bon Appetit!

Friday, February 15, 2008

Veal Piccata

Let's face it. I love Italian food. Even if it isn't your every day red sauce meal.

First, there's nothing wrong with red sauce. I love it very much. My wife loves it as well.

However, you can't have tomato sauce every day, and Italian recipes offer much more than just sauce.

Enter Veal Piccata. I've always loved it. I can't remember the first time I had it, but it was most likely after I got married, since I wasn't the kind of person to experiment with new ideas before then.

Anyway, I made Veal Piccata about a year ago, and was amazed. The veal was grilled on my grill pan, and then added to the sauce.

Amazingly, I never kept the recipe I used!

This week, I got a good deal on Veal Scallopine at McKinnon's market, and I wanted to make Veal Piccata. So... I had to search the web to find the recipe I found back then. I think I managed to find it!

I made this on Tuesday, and it's just as good as I remembered.

Have fun!


Veal Piccata


Source:Gourmet, January 2002
Active Time:20 min
Total Time:30 min
Yield:Makes 8 servings.
Catalogued:12-Feb-2008


Grill the veal while the noodles boil so both are ready at the same time.

Sauce

1 ¼ cups low-fat chicken stock or low-sodium fat-free chicken broth

⅓ cup dry white wine

1 tablespoon all-purpose flour

2 tablespoons water

1 tablespoon unsalted butter

1 tablespoon fresh lemon juice

2 tablespoons chopped fresh flat-leaf parsley


Boil stock and wine in a 2- to 3-quart heavy saucepan until reduced by about half (to about ¾ cup), about 3 minutes. Whisk together flour and water in a cup, then whisk into stock. Boil, stirring, 1 minute, then remove from heat and stir in butter, lemon juice, and salt and pepper to taste. Keep sauce warm.

Veal

2 lb veal cutlets (also called scallopini; ¼ inch thick)

¾ teaspoon salt

½ teaspoon black pepper

1 lemon, thinly sliced


Cut veal into 3-inch pieces, then pat dry with paper towels. Lightly oil grill pan and heat over high heat until just smoking.

While pan is heating, sprinkle veal with salt and pepper. Grill veal in batches, without crowding, until browned, about 30 seconds on each side, transferring with tongs to a platter. Grill lemon slices, in batches if necessary, until lightly browned, about 1 minute per side, transferring to platter with veal.

Stir parsley into warm sauce and pour over veal.

Serve with buttered noodles with chives

If uncooked cutlets are more than ¼ inch thick, pound to ¼ inch thick between 2 sheets of plastic wrap with a rolling pin.

Nutritional Information

calories143
grams fat2


Bon Appetit!

Tuesday, February 5, 2008

Rolled Tacos

According to the Wikipedia, taquitos are small rolled-up tortillas with some sort of filling, usually beef or chicken. They are also called Rolled Tacos, and sometimes (usually when made with flour tortillas) Flautas.

I first came upon these things as flautas when I was living in Miami. A few restaurant had these intriguing things in the appetizer sections called "Flautas" and I tried some. I wasn't particularly impressed with them at the time; they seemed to be crispy rolls that didn't really have much to offer as far as taste was concerned—they just didn't have enough filling in them for my taste.

Over the years, I saw flautas on menus, usually as an appetizer, but occasionally as an item in the "combination plates" as well. I didn't really dislike them, but I never really found myself impressed with them. In fact, my impression was that they were just chimichangas with smaller tortillas and without most of the filling. Almost always, they were served "dry" without any sauce on top as a chimichanga would be served, but with some sort of salsa to accompany them.

I'm not sure when I first encountered taquitos by that name. I'm pretty sure that, like flautas, they were on the appetizer or combinations section of Mexican menus. I noticed something about them almost immediately: they tasted better. I think the difference (to me) was that fried corn tortillas have an inherent crunch and taste that is simply lacking in flour tortillas. They still didn't have much as far as filling was concerned, but they were a step up from flautas to my taste.

Today, you can find taquitos in many supermarket freezer sections. Get a box of ten or twenty and heat them up in your oven. Simple meal or snack. Of course, when I first tried these frozen varieties, I knew that I needed something to dip them into. Salsa was an obvious choice, but I wanted something a bit special for these.

I'm not sure where I got the idea the first time, but I distinctly remember making a spicy ranch dip. I simply put some ranch salad dressing into a small dipping bowl. To this, I added some chili powder and a few drops of hot sauce. Voila! Instant classic in less than a half hour!

While I still get the frozen taquitos, I've noticed that a lot of them are now being made with flour tortillas: exactly what I didn't like about flautas originally! Luckily, the boxes will tell you what you are getting, but you should look carefully!

Recently, I started making taquitos from scratch. I surprised Sandra by making a breakfast for her one weekend. I made an omelet, and added ground chorizo and some salsa to make the filling, which then I wrapped into small corn tortillas that I first sprayed with cooking spray. I assembled the breakfast taquitos onto a cookie sheet and cooked them in the oven for about twenty minutes. Sandra really liked the result!

Sandra noticed recently that Rachael Ray had a recipe for taquitos on her "Thirty Minute Meals" show, and she asked me to capture the recipe for her into our recipe collection.

I'm excerpting her recipe below, which also includes some burritos (you decide if you want both taquitos and burritos!).


Poquito and Grande: Taquitos and Burritos


Source:Rachael Ray—30 Minute Meals—Food Network
Prep Time:15 minutes
Cook Time:30 minutes
Yield:6 to 8 servings
Catalogued:04-Feb-2008

Taquitos

2 cups shredded rotisserie chicken

1 teaspoon ground cumin

½ teaspoon dried oregano

Salt and freshly ground black pepper

1 can chopped green chiles, 4 ounces

A few leaves fresh cilantro or parsley, finely chopped

Vegetable or canola oil, for frying

12 (6-inch) corn tortillas


Preheat oven to 425°F.

Season the chicken with cumin, oregano, salt and pepper and mix in the chiles and cilantro or parsley. Dip the tortillas in 1-inch warm oil to soften. Tightly roll a couple of forkfuls of chicken up in the tortillas. Place seam side down and bake 12 minutes.

Dipping Sauce For Burritos And Taquitos

1 tablespoon extra-virgin olive oil

1 red onion, chopped

2 cloves garlic, grated or finely chopped

1 teaspoon sugar

1 tablespoon chili powder, a palm full

1 ½ teaspoons ground cumin, ½ a palm full

A pinch ground cinnamon

Salt and freshly ground black pepper

1 (28-ounce) can fire roasted crushed tomatoes


Heat a sauce pot over medium heat and add 1 tablespoon extra-virgin olive oil, red onion and garlic and soften 5 minutes then season with sugar, chili powder, cumin, cinnamon, salt and pepper and stir in the fire roasted tomatoes. Reduce heat to low and simmer.

Burritos

8 (8-inch) flour tortillas

3 tablespoons extra-virgin olive oil, divided

1 ½ pounds ground pork

1 small zucchini, grated

2 cloves garlic, grated or finely chopped

2 to 3 tablespoons (medium to hot) chipotle in adobo, mashed into paste

Salt and freshly ground black pepper

1 (19-ounce) can black beans (recommended: Progresso)

2 cups shredded Chihuahua cheese or Monterey Jack or Cheddar

½ head iceberg lettuce, or 1 heart romaine, shredded


Heat a large skillet over medium-high heat with 2 tablespoons extra-virgin olive oil. Add the pork, brown it for 2 minutes then add in zucchini, garlic, chipotle in adobo and salt. Cook for about 7 to 8 minutes more.

Heat the last tablespoon of extra-virgin olive oil in a small nonstick skillet. Add the black beans and mash with a fork. Season the beans with salt and fry until crisp at edges, about 3 to 4 minutes.

Soften tortillas in microwave or in hot oven. On each tortilla pile a little refried black beans, cheese, pork and lettuce. Tuck in the sides then wrap and roll the tortilla.


Bon Appetit!

Monday, December 3, 2007

Gumbo

I spent a lot of time last week wandering through Shaw's supermarket after work trying to come up with ideas for meals for Sandra and myself. Our nest is still empty, and I don't have too many items in my repertoire for two people.

On Sunday, I got a great idea. Instead of going to Shaw's looking for ideas, I should go to McKinnon's Meat and Super Butcher Shop instead.

McKinnon's is, as its name suggests, a combination butcher shop, meat market, and super market... all rolled in one. The prices for groceries aren't bad, but their specials on meat, poultry, and seafood are fantastic!

They advertised Baby Back ribs for less than $2.50—but they were unfortunately out of stock. Sandra and I looked at different meat items until I came across their andouille sausage.

"I could make gumbo," I suggested without much hope.

"Do you know how to make it?" Sandra asked.

"I think I have a recipe in my private collection," I answered. (I did; it was one of Rachael Ray's 30 Minute Meals.)

Sandra then surprised me by saying, "If you want to make it, then I'll try it."

Up until that moment, Sandra never even tried gumbo. I've found a couple of restaurants that serve it—like Border Cafe, which serves it as an appetizer, but every time I offered a taste to Sandra, she always turned me down.

I was so happy that Sandra gave me the chance that I realized that I did not actually know what was needed for the recipe. I knew that okra played a big part, and suggested celery and onions. I wanted to make it with chicken, sausage, and shrimp (Hey! Why not go for broke?). I checked a can of Campbell's Gumbo Soup (their Healthy Request version of Gumbo is surprisingly good, by the way!), and checked the recipes and confirmed the ingredients, which included tomatoes, so I got a big can of crushed tomatoes as well. Instead of green pepper, which doesn't appeal to either Sandra or me, I got a tiny can of chopped green chiles from the Mexican aisle.

When I got home, I searched my recipe file and found Rachael's recipe. It wasn't exactly what I wanted, so I searched the recipes on FoodNetwork.com, and found about seven pages of hits for gumbo.

The one I chose had most of the ingredients that I already had, with the exception of shrimp, which I figured could be added in later.

When I made this recipe, I noticed a few things:

  • I needed more than the three tablespoons of oil to make the roux
  • I needed more than a half cup of flour, but the recipe DOES say a half cup plus flour for dredging. I dredged the chicken in the half cup of flour, and used the remainder for the start of the roux. I needed to add more flour to get what I thought was enough.
  • I threw a handful of peeled shrimp into the gumbo about fifteen minutes before I was ready to serve the dish.
  • Next time, I think I will cook the vegetables separately, since cooking them in the roux didn't seem to work so well.
  • Sandra found out at the last minute that we didn't have white rice, so we substituted jasmine rice (Thai rice) instead, which worked nicely.
  • I used the crushed tomatoes rather than the peeled whole tomatoes called for in the recipe. After putting in about half a can, I realized I had enough, so I put the remainder into the refrigerator for later on this week when I make an Italian sauce.
  • I used some spicy creole seasoning (not very much, though) instead of the red pepper, since I didn't want to make the gumbo too spicy.

Sandra's verdict? She liked it! She was surprised that it wasn't very spicy at all, which I think was the reason for her hesitancy for even trying it in a restaurant.

We had enough for two meals (so much for the "meal for two" I wanted to make), and we plan on having leftovers on Monday evening.


Chicken and Andouille Gumbo


Source:From Food Network Kitchens
Prep Time:15 minutes
Cook Time:50 minutes
Yield:6 to 8 servings
Catalogued:02-Dec-2007

Ingredients

2 to 3 tablespoons vegetable oil

12 ounces andouille sausage, cut into 1-inch pieces

½ cup all-purpose flour, plus more for dredging

Salt and freshly ground black pepper

12 chicken thighs

2 medium onions, sliced

2 red or green bell peppers, stemmed, seeded and cut into strips

2 ribs celery, chopped

10 ounces fresh or frozen okra, cut into ½ inch pieces

10 cloves garlic, roughly chopped

3 sprigs fresh thyme or 1 teaspoon dried

2 bay leaves

1 teaspoon crushed red pepper flakes

6 to 8 cups low-sodium chicken broth

1 (15-ounce) can whole peeled tomatoes, with their juice

2 tablespoons cider vinegar

3 scallions (whit and green parts), thinly sliced

Chopped parsley leaves, for garnish


Heat a large Dutch oven over medium-high heat and add the vegetable oil. Add the sausage and cook, stirring occasionally, until browned and much of the fat is rendered. Remove the sausage to plate with a slotted spoon.

While the sausage browns, pour a good amount of flour into a shallow baking dish, and season with salt and pepper. Dredge the chicken with the flour and add to the Dutch oven, in batches if necessary, and cook until brown on both sides. Remove to the plate with the sausage.

Add the ½ cup flour to the Dutch oven and cook, stirring constantly, until light golden brown. Add the onions, peppers, and celery to the Dutch oven and cook, stirring, about 2 minutes. Stir in the okra and the garlic and cook, stirring, about 2 minutes.

Strip the leaves from the thyme into the Dutch oven, and stir in the bay leaves, red pepper flakes, and 6 cups broth. Crush the tomatoes through your hands into the pot. Return the chicken and sausage to the pot, bring to a boil, reduce the heat, and simmer, uncovered, 25 to 30 minutes, until the chicken is cooked through. Stir in some additional chicken stock to thin the sauce a bit, if desired.

Stir in the vinegar, scallions, and parsley, taste, and adjust the seasoning.

Rice

2 cups long-grain rice

3 cups water or chicken broth

1 teaspoon kosher salt

Freshly ground black pepper


Put the rice in a medium saucepan with a cover. Stir in the water or broth, salt, and pepper. Smooth the rice to make an even surface, cover and heat over low to medium-low heat until all the liquid has been absorbed and rice is tender, about 15 to 20 minutes.


Bon Appetit!

Wednesday, November 28, 2007

French Bread Pizza

(Sorry for the delay in posting; holidays and everything kept me busy! —lar3ry)

When the kids were very young, Sandra and I had two vastly different work schedules. She worked from about 3pm until 11pm at night (evening shift), and I worked during the day. We usually had a babysitter watch the kids between the time Sandra had to leave for work, and the time I got home, although we sometimes used day care instead.

What this meant was that I was responsible for feeding the kids their supper. When they were in the "baby food" ages, I had a selection of a few pre-made foods for the kids. Sandra used to joke that I wouldn't feed the kids anything I wouldn't eat myself, and that was actually mostly true. The kids ended up eating a lot of mashed banana, sometimes carrots, and some rice cereal for the most part.

When the children were old enough for "real food," they progressed quickly from Cheerios and other bite-size items to more sophisticated items like soups and pizza.

Now, I've already explained history with pizza in another blog entry, and I won't repeat myself here. Needless to say, I knew that the kids loved pizza, and it wasn't in my heart to avoid it. For a time, those "Red Baron" mini-pizzas that you could cook in a microwave were popular, but they started to get repetitive. Another frozen pizza that I seemed to always have liked is Ellio's (the square pizzas), but they weren't a big hit with the girls. A small pizza from the pizza place just down the road from my house was cheap enough (about three dollars for a plain pizza), that I occasionally chose that as well.

At the time, I was working in Boston's North End in a building that sits right across the street from the Paul Revere house on North Street. The North End is a well known Italian neighborhood, and has many block party "feasts" throughout the year.

On my way home, I would walk from my office, through the North End, towards the Boston Garden, and pick up my commuter rail at North Station. The trek through the North End had me passing a number of bakeries, and one day as I was passing by, I saw a large loaf of French Bread. That got me to thinking about French Bread pizza—something that Sandra and I may have had once or twice, but I don't think we ever made it from scratch. "How difficult could it be?" I asked myself, and I purchased a fresh loaf on my way home.

I love fresh bread, and it was a big act of self-control that kept me from eating the bread while I was sitting in the train on my way home. However, I had a couple of hungry pizza-eaters to feed, so good ol' dad kept his appetite at bay and the loaf made it safely through the train ride in one (complete) piece. Driving home, I stopped at the grocery store to purchase some pizza sauce from a jar (I wasn't that familiar with making my own pizza sauce), and some shredded mozzarella.

I was set.

At home, I cut the bread, added the sauce and cheese, and popped it into the oven until the cheese melted (about 400 F for about ten minutes).

The kids loved it!

I did, too, although I simply made mine without the sauce and cheese—toasted French bread!

Over the years, I varied the recipe a bit, sometimes using leftover (homemade) spaghetti sauce, sometimes adding cooked sausage or slices of pepperoni, and this was always a quick, easy meal to make.

A couple of years ago, while watching Rachael Ray on Food Network's "Thirty Minute Meals," I saw Rachael make what I thought was a French Bread Pizza on Steroids. Of course, she had her own name for it (shown below).

I've made this myself, although I did my own take on the recipe, as neither Sandra nor I wanted the pepper, spinach, or ricotta. Still, Rachael's recipe was a great starting point for a whole new era of French Bread pizza at my house. It's still a quick and easy meal.


Super Stuffed French Bread Pizza Rustica


Source:Rachael Ray—30 Minute Meals—Food Network
Prep Time:10 minutes
Cook Time:25 minutes
Yield:4 servings
Catalogued:03-Nov-2005

Ingredients

1 (2 foot long) loaf French bread

1 pound sweet Italian sausage

1 tablespoon extra-virgin olive oil

1 small red bell pepper, seeded and chopped

1 small onion, chopped

2 large cloves garlic, chopped

1 package frozen chopped spinach defrosted and squeezed dry

Salt and pepper

1 ½ cups part skim ricotta

½ cup grated Parmesan

½ pound sweet sopressata, from the deli, sliced thick, chopped

½ stick pepperoni, chopped

1 sack (10 ounces) shredded mozzarella

1 sack (10 ounces) shredded provolone

1 teaspoon dried oregano

1 teaspoon crushed red pepper flakes


Preheat oven to 425°F.

Split bread lengthwise and hollow it out. Cut in half across, making 4 shells for pizzas.

Heat a skillet over medium high flame and brown sausage in extra-virgin olive oil. Brown and crumble sausage. Add red bell pepper, onion and garlic. Cook 3 to 5 minutes, add spinach. Remove mixture from heat and season with a pinch of salt and black pepper, to your taste.

Transfer to a bowl. Combine sausage and veggies with ricotta, Parmesan, sopressata and pepperoni. Fill bread shells and top with mounded mozzarella and provolone cheeses. Place in hot oven on cookie sheet and bake until cheese melts and bubbles and bread is super crisp, about 10 to 12 minutes. Top pizzas with oregano and hot pepper flakes. Serve immediately, or snack all night!


Bon Appetit!

Tuesday, November 13, 2007

Pasta with Meat Sauce

My family has come to enjoy my pasta with meat sauce recipes. I use the plural here, because my sauce comes in about three varieties: traditional, without vegetables, and with ground meat.

The first variety, which is most closely associated with the Italian Bolognese sauce, consists of cubes of beef simmered with onions, carrots, celery, beef stock, and crushed tomatoes. Now, according to the Wikipedia, my use of tomatoes may make it less than authentic, but we seem to enjoy it this way.

Sandra, however, doesn't really like when I add the finely cubed vegetables (carrots and celery) to the meat, which is about the only time that I prefer more vegetables to a dish than Sandra. If I'm in a rush, I will use ground meat (make sure it's relatively lean, about 85%) to make a quick meal. Hence the three varieties.

Below is my traditional meat sauce with notes at the bottom for additional varieties.


Bolognese Sauce


Source:My recipe that evolved over twenty some-odd years
Yield:Serves 4-6
Catalogued:13-Nov-2007

Ingredients

2 ribs of celery, chopped into small cubes

1 carrot, chopped into small cubes

2 Tbs olive oil

1 ½ lbs lean beef, cut into small cubes

1 medium onion, chopped

1 can beef broth

¼ cup red wine

1 Tbs dried basil

1 Tbs dried bacon bits (artificial is fine)

28 oz can crushed tomatoes (Contadina preferred)

6 oz can tomato paste

1 lb hearty pasta (linguine, tagliatelle, perciatelli, bucatini, or penne)

Grated hard cheese (Parmesan or Romano)


Chop the ribs of celery and carrot into tiny (about ⅛") cubes. Slice the onion thinly, and then chop to make small cubes.

Using a Dutch oven, drizzle the olive oil onto the bottom of the pot over medium-high heat, and rotate the pot until the oil covers the bottom. Add chopped carrots, celery, and onions, and cook for about five minutes, stirring occasionally, until the onions are translucent. Add extra oil, if necessary.

Add the cubed beef and continue to cook, stirring occasionally to ensure that all the beef is cooked. Sauté the meat and vegetable mixture for an additional three minutes and then add the broth, wine, basil, bacon bits, tomatoes, and paste.

Wait until the mixture starts to bubble and then lower the heat to medium-low. Cover the pot and simmer for at least twenty minutes— the longer you cook, the more chance for the flavors to "marry."

Prepare a pound of pasta according to package directions until al denté.

Serve Bolognese sauce over pasta, garnishing with Parmesan or Romano cheese, as desired.

  • Add one frozen sausage, cubed for additional flavor
  • Ground beef may be substituted for the cubed meat
  • Sandra prefers the sauce without the cubed vegetables


Bon Appetit!

Tuesday, November 6, 2007

Sour Cream Chocolate Chip Cake

Here is an understatement: Baking is not my forté.

I'll give you a moment to recover from your shock, but it's true. My wife and kids love to cook brownies, cakes, pies, and all sorts of great dessert dishes, and I am usually relegated to watching from a distance.

Immediately after I married Sandra, she moved to Miami with me. I had been living there for about three years at that time; our long-distance relationship turned into a marriage that has been going on for over a quarter of a century now.

As with most marriages, the first year was probably the most difficult. It was the first time either one of us lived with somebody else that was not directly related and, adding to the many things that Sandra had to put up with, she was living fifteen hundred miles away from her family in sunny, hot, and humid Miami.

Now, I can give you a list of many nice things about Miami, but it would be augmented by an equally long list of things that weren't so nice, especially if you consider that she moved down her in the aftermath of the Mariel boat lift with the attendant rise in crime throughout south Florida. If you don't know what I'm talking about, watch the Al Pacino movie "Scarface."

We moved to Miami in the early summer, when the humidity was pretty brutal. Sandra isn't a big fan of "hot and humid," which was about the only way to describe the climate. However, in the autumn, the humidity was starting to get manageable, and usually stays that way until spring rolls along.

The two of us survived the fifteen months that we lived there, though. We even had some fun.

At the time, I was working at Burger King's headquarters, which (then) was situated right across the street from the Dadeland Mall. Sandra was working at Jordan Marsh at that mall, and we'd usually meet every day at the mall for some lunch.

In the mall, one of our favorite restaurants was La Crepe, a French-like bistro that specialized in crepes that had some nice salads—in fact, it was the only place where I've had a spinach salad more than once! This restaurant was located near a food court, which had some interesting fast food places that we sometimes patronized as well. There was a Victoria Station restaurant there as well, where you could get some great prime rib for a decent price.

In the food court at Dadeland Mall was a place that was popular with the people at work. Its name was "Hot Cookies" (it's apparently still there!) and this place specialized in Toll House style cookies. I remember seeing that they advertised special occasion cakes as well.

That next November, when Sandra's birthday arrived, I asked some of my co-workers what I could do that would be special for her first birthday in Miami. Somehow, I got the idea for a special birthday cake, and Hot Cookies sprang immediately to mind. I had a mental image of a Toll House cookie the size of a layer cake, and with that image in mind, I ordered a birthday cake for Sandra.

Later on that day, I picked up the cake, then invited Sandra to the office to celebrate her birthday. I admit that I was a bit surprised when I picked up the cake; instead of something yellow with chocolate polka-dots that I was expecting, the cake was a frosted with a deep, dark, chocolate brown icing. I brought it to the office and we put on the candles, and when Sandra arrived, we let her blow them out and she, my co-workers, and I had a happy snack.

That chocolate chip cake was wonderful! Below the dark chocolate frosting was a light yellow bundt cake with chocolate chips embedded within.

On a later trip to Hot Cookies, Sandra and I asked about the cake, and we found out that it was a sour cream cake with a dark chocolate sour cream frosting.

Since Burger King was owned by Pillsbury at that time, I naturally had a copy of a Pillsbury cookbook (I purchased a few the previous December, and used some as gifts). I managed to find a recipe for "sour cream chocolate chip cake" in that book. In another recipe book, James Beard's "American Cookery," I found a recipe for sour cream chocolate frosting that used chocolate chips. I combined the two recipes, and managed to re-create that wonderful birthday cake that Sandra had for her birthday.

Let me put this in context. I managed to re-create that cake, despite my admitted unsophistication with baking. Now, add the fact that this was also the first cake I ever tried to bake that didn't come out of a box. My goodness, I think I must have hit a jackpot!

Ahh, the memories...

Our nest won't be so empty next weekend, as the kids and Sandra's father come over to visit for Sandra's birthday. It's my plan to once again attempt to bake this cake for Sandra's birthday. The recipe is easy, although I've found that getting the chocolate chips to scatter throughout the dough is a bit tricky—they usually seem to pool around the middle of the cake when I make it. However, if I don't get it perfect, I know that I'll probably have a couple of helpers around to help me get it right. After all, they are the bakers!

Happy birthday, Sandra!


Sour Cream Chocolate Chip Cake


Source:Pillsbury Kitchens' Family Cookbook (cake)
James Beard's American Cookbook (frosting)
Prep Time:10 minutes
Cook Time:40 minutes.
Yield:1 bundt cake
Catalogued:13-Nov-2005

Ingredients

2 cups all-purpose or unbleached flour

1 ½ cups sugar

2 tsp baking powder

½ tsp baking soda

½ tsp salt

1 ⅓ cups dairy sour cream

⅔ cup margarine or butter, softened

1 tsp vanilla

3 eggs

½ cup sugar

1 tsp cinnamon

1 6 oz package (1 cup) semi-sweet chocolate chips


Heat oven to 350°F. Grease (not oil) bundt cake pan.

In large bowl, blend first 9 ingredients at low seed until moistened. Beat 3 minutes at medium speed.

Pour half of batter (about 2 ½ cups) into prepared pan.

In a small bowl, combine ½ cup sugar and cinnamon. Sprinkle half of sugar mixture and chocolate chips over batter.

Repeat with remaining batter, sugar mixture and chocolate chips. Bake at 350°F for 35 to 40 minutes, or until toothpick inserted in center comes out clean.

Chocolate Frosting, Helen Evans Brown

5 oz semi-sweet chocolate

⅜ tsp salt

½ cup sour cream


Melt the chocolate in the top pan of a double boiler over hot water. Blend in the salt and sour cream and let the frosting cool.

This recipe provides enough frosting to cover the top and sides of a bundt cake.


Bon Appetit!

Wednesday, October 31, 2007

Bertucci's Sausage and Rice Soup

I've been busy in real life, and haven't had time to update this blog since last week's thoughts on my new iPod Touch.

Today's recipe is one that I reconstructed from one of my favorite soups at a local restaurant chain, Bertucci's. This is a nice place for a good meal, and I like their Caesar salad, Tuscan chicken wing appetizer, and their sausage soup, and it is the soup that I'm going to share with you.

I'm not sure what made me order the soup the first time I did, but I've ordered it many times since. I think what appeals to me is the soup's inherent simplicity.

In the recipe below, I add diced tomatoes to be more in line with Bertucci's recipe, but when I make it on my own, I tend to leave them out, as I don't feel that they add much to the soup. Feel free to include or exclude them.


Sausage and Rice Soup


Yield:Serves 4
Catalogued:31-Oct-2007
This recipe is my homage to the Sausage Soup that one can get at Bertucci's. The restaurant describes this soup as "A hearty soup with rice, spinach, tomatoes and sausage. Topped with a dab of mozzarella cheese." From this simple description, I created my own version, based on my own, personal tastes (I am not a big spinach fan...)

Ingredients

1 tbs olive oil

1 lb ground sausage meat (removed from casings)

32 oz chicken broth

10-20 fresh basil leaves (approximately, to taste)

12 cherry tomatoes, quartered

Salt and pepper to taste

1 cup cooked rice (instant rice is sufficient)

⅛ cup shredded mozzarella cheese


In a dutch oven on medium-high heat, add olive oil (enough to cover the bottom of the pot). When oil is hot, add sausage meat in small quantities until cooked.

Add chicken broth and raise heat to high until broth boils. Add whole basil leaves and chopped tomatoes to broth and lower heat to medium-low. Cover and simmer for about 20 minutes.

To serve, add about a quarter cup of rice to each soup bowl, and then add the soup to the rice. Sprinkle the top of the soup with some mozzarella cheese.

Serve immediately.


Bon Appetit!

Thursday, October 18, 2007

Steak Sandwiches

Before my two girls were born, Sandra and I had a friend, Michael, living in the room that the girls would eventually call theirs.

It was late in January, and I had some food show on PBS playing. I wasn't listening very carefully, as I was making breakfast at the time. However, I heard enough that a strange steak sandwich was being made.

How strange, you may ask? Well, instead of putting some meat between a couple of slices of bread or on a torpedo roll, the person filled a round bread boule with steak, cheese, and other stuff (including tomato sauce!). The resulting sandwich was baked in an oven, and then cut into quarters to serve.

Well, I told Sandra and Michael about this sandwich, and they were both intrigued. Neither one was interested in the tomato sauce part, but both like the kind of steak sandwiches you could get from sub shops locally.

Well, I went out, purchased the bread, some steak, some cheese... and the rest is history.

I'm sorry I don't remember the cook that introduced me to the concept, but this sandwich has become a regular staple for our family on Super Bowl Sunday, and a few other times during the year.


Steak Sandwiches


Catalogued:18-Oct-2007
I saw somebody prepare something like this on television a day or so before Super Bowl back in the mid-1980s. It has been a staple of our Super Bowl Sundays ever since.

Ingredients

1 large bread boule

2 Tbs butter

1 cup thinly sliced onions

¼ lbs sliced mushrooms (optional)

¾ lbs shredded steak

½ lbs sliced provolone cheese, sliced into thin strips


Heat oven to 350°F.

With a bread knife, slice the top off the the bread boule. With your fingers, hollow out the bread inside the boule to about ¼" thickness maximum.

Warm a flat-bottomed skillet over medium heat and add butter. When the butter has melted, add the onions, stirring with a wooden spoon to ensure the layers separate until transparent. Add sliced mushrooms (if using) to the skillet and sauté until they go soft. Move the onions and mushrooms to a side of the skillet.

Add the steak in small amounts, allowing each piece to stretch out to make contact with the bottom of the skillet in order to heat quickly. As the pieces brown, move them with a wooden spoon to the side and add more pieces until all the steak is heated through.

Take a couple of slices of provolone cheese and slice them into thin strips. Add the strips of cheese on top of the meat, and combine the meat, onions, and mushrooms to mix everything thoroughly. As soon as cheese starts to melt, remove from heat.

Assemble the sandwich: put a third of the remaining strips of provolone cheese on the bottom of the bread boule, followed by half the meat mixture. Add another third of the cheese on top of the meat, followed by the rest of the meat. If possible, stir the warm meat and cheese together inside the boule. Add the remaining third of the cheese on top of the meat, and put the sliced-off top of the bread boule to reassemble the bread.

Put the sandwich onto a cookie sheet and place into the oven. Cook for 10-15 minutes, until the bread is a bit crispy and the cheese inside is fully melted.

Carefully cut boule into quarters with a serrated-edge knife. Serve warm.


Bon Appetit!

Wednesday, October 17, 2007

Filet Mignon with Roasted Yukon Gold Potatoes

It's been a rather hectic weekend extending all the way to today (Wednesday). We went to the new McKinnon's Super Butcher Shop here in Salem yesterday to explore and hopefully purchase some good food.

I'd like to state that finding Filet Mignon for $5.99 was quite a deal. (We got some other deals as well, but this one stands out in my mind). I cooked this on the grill last night, and served it with Roasted Yukon Gold potatoes.

Cooking a steak on a grill is an art in itself. If you don't take care, you can easily turn an expensive cut of meat into something resembling a fire sale at Macy's. I know—I've done so as recently as a couple of months ago. (Note to self: Don't try to fix a computer problem while you're trying to cook dinner!)

Last night, the filet came out perfect. Sandra's was the perfect shade of pinkish-red (she's a medium person), and mine was done a bit more, with just a bit of pink. For myself, I made a quick "steak sauce" by mixing (on my plate) a little bit of Sesame-Ginger teriyaki sauce, about a tablespoon of Merlot, a drop or two of Worcestershire sauce, and a couple of drops of Dijon Mustard, and then mixed the lot together to make a bit of an emulsified sauce. I served my filet over this sauce, with the potatoes on the side.

To Sandra's surprise, the potatoes also came out perfect. I have had a couple of experiences where I cut the potatoes too small (about ¼") or cooked them on too high heat, and they tended to char through in no time at all, turning a delicious side dish into charcoal in no time. Yesterday, I allowed Sandra to cut the potatoes this time, and she came up with the perfect size: about an inch dice.


Grilled Yukon Gold Potatoes with Rosemary


Source:Rachael Ray—30 Minute Meals—Food Network
Prep Time:10 minutes
Cook Time:20 minutes
Catalogued:17-Oct-2007
This recipe comes from one of Rachael Ray's 30 Minute Meals, and although she roasts hers in the oven, I found that this makes a great dish on the grill. A good "vegetable grilling pan" is a must here—we have a non-stick one that is square with ⅛" holes with slanted sides that reach about six inches, which holds the potatoes nicely.

Ingredients

Yukon Gold potatoes; figure about 1 large or a couple of small pototoes per person

Non-stick aerosol spray (Pam)

Extra-virgin olive oil

1-2 Tbs dried or fresh rosemary

Garlic salt (to taste)

Freshly ground black pepper (to taste)

Fresh thyme sprigs (optional)


Preheat the grill to about 400°F.

While grill is heating, dice the potatoes to about ½" to 1" pieces—bite size, but not too small.

Spray grilling pan with non-stick spray, and place the diced potatoes onto the pan. Drizzle olive oil over the potatoes, and then add rosemary, salt, and pepper. Toss the potatoes in the grill pan to ensure that all the pieces are coated with oil, herbs, and seasonings, adding more as necessary.

Place potatoes on grill over burner at high heat for about ten minutes, covering the grill to allow it to bake.

Using a spoon and pot-holder, toss the potatoes again to allow them to cook on all sides, and lower the burner to medium. Re-toss the potatoes every five minutes or so, being careful not to smash them.

When potatoes are cooked on all sides, lower heat to just barely on and keep on grill to warm until your main course has finished cooking.

Sprinkle additional garlic salt and pepper, to taste, and serve with a sprig or two of fresh thyme.

Serve warm.


Bon Appetit!

Wednesday, October 10, 2007

Knots of Garlic

In one of my first posts to this blog, I described the first time I attempted to re-create Shrimp New Orleans that I enjoyed at Bubba Gump's Shrimp Company, a chain of theme restaurants.

In that article, I mentioned that as I was creating the dish, my brother-in-law was showing Chardonnay (and Sandra) how to make Garlic Knots. The two dishes came out about the same time, and they complimented each other wonderfully.

For those that don't know what Garlic Knots are, they are tiny strips of pizza dough twisted into an overhand knot (about an inch in diameter). The knots are baked and then drizzled in garlic and butter and served warm. Garlic Knots are usually served in pizzerias as a snack. They are pre-made in the morning, and then when a customer orders some, they are put into a foil dish and heated for a few moments in the pizza oven.


Garlic Knots


Source:Craig Noe
Yield:Serves 4-8
Catalogued:09-Oct-2007
Craig showed Chardonnay how to prepare garlic knots. This is my re-creation of the recipe he used.

Ingredients

1 recipe pizza crust dough

¼ cup olive oil, extra-virgin

¼ cup butter

1 tbs granulated garlic

⅛ cup grated Parmesan cheese (optional)


Preheat oven to 375°F.

In a small saucepan, melt the butter and olive oil together over low heat until the butter melts. Add the granulated garlic to the butter-oil, and continue to heat stirring until garlic is fully dissolved in the oil. Lower heat enough to keep just warm.

Using a pastry brush, grease the bottom of a small baking dish with the garlic-infused olive oil.

Once dough has risen, separate into two separate pieces. Set half aside for use another time.

Divide the remaining dough into strips. Craig does this by flattening the dough to about ¼" thickness and then using a pizza cutter to cut the dough into ¾" strips, and then cutting the strips to about 4" in length. Loop each strip into an overhand knot. Place knots into the baking dish with just a bit of space between them to allow for expansion as they bake. (The knots are supposed to "cuddle together" as they bake, so don't keep them too far apart—a ⅛" space between them should be sufficient.)

Bake the knots in the 375°F oven for 8-10 minutes, until golden brown.

Remove knots from oven and drizzle garlic-butter-infused oil over the knots in the baking dish. Allow a minute or so for the oil to absorb slightly, and then remove the knots into a bowl large enough to accommodate them, tugging gently to pull them apart in the baking dish.

Add the rest of the garlic-oil to the knots and toss ensure that the knots are all coated with oil. Cover the bowl with a towel until a few minutes before serving.

Serve warm. If the knots are cool, place them in a 350°F oven for a few minutes to warm through.

(Optional) Sprinkle the knots with Parmesan cheese before serving.

Note: Most pizzerias on Long Island make a large batch of knots in the morning, and as they are requested by customer, they are placed in a small, round, foil dish and heated in the pizza oven for about 3-4 minutes to warm through.

Craig informs me that pizzerias use granulated garlic instead of fresh, and less butter and more olive oil to keep the knots from turning rancid during the day.


Bon Appetit!

Friday, September 28, 2007

A Simple Japanese Meal

Japanese food consists of simple ingredients, simple preparation, and impeccable presentation. This column will detail two simple dishes that don't take a lot of time to prepare to make a good Japanese meal.

This meal comes mostly from a recipe book that Sandra and I truly love: "Cooking With Mickey" (a collection of recipes from various restaurants at Disneyland and Walt Disney World). We have two volumes of this book—a first volume which has a light cardboard cover and plastic spiral binding, and the second volume which has a traditional "hard cover" with the same spiral binding.

In EPCOT's World Showcase, there is a tiny restaurant in the Japan pavilion called the Yakitori House. The specialty of this restaurant is, as you might guess, Chicken Yakitori. The cookbook has the recipe for the Yakitori Sauce, and the rest of the recipe is my recreation of the Chicken Yakitori.


Chicken Yakitori


Source:Cooking With Mickey, Gourmet Mickey Cookbook Volume II
Yield:4 Servings
Catalogued:28-Sep-2007

Yakitori Sauce

¼ cup Sake wine*

1 cup Mirin wine

1 cup soy sauce

1 tbs sugar

2 tbs cornstarch

⅓ cup water


*Note: Like Sake, Mirin wine is a rice-based wine. Sake can be used instead for a total of 1 ¼ cups.

Chicken Skewers

1 lb boneless chicken thighs, cut into half-inch pieces

2 green onion, cut into half-inch pieces (optional)

bamboo skewers


Combine Sake and Mirin (if using both) in a medium-size saucepan and bring to a boil. Add soy sauce and sugar. Simmer, covered, for 30 minutes.

Soak bamboo skewers in cold water for 30 minutes (to prevent burning during grilling).

Dissolve cornstarch in water and add to the sauce. Cook and stir until mixture thickens.

Heat grill to medium high, or preheat grill pan over a medium-high burner.

Thread chicken pieces onto skewers, optionally alternating with green onions, about 4-6 pieces of chicken per skewer.

Begin grilling the chicken skewers without the sauce, turning after five minutes. When the meat starts changing color, brush the sauce on both sides, and continue grilling, brushing onsauce about four times total, turning until done (about ten minutes total).

Serve hot over rice.


No Japanese meal would be complete without a fresh, crispy salad of iceberg lettuce, some shredded carrots, a bit of red cabbage, and this wonderful Ginger Dressing...


Ginger Dressing


Source:Cooking With Mickey, Gourmet Mickey Cookbook Volume II
Yield:2 quarts
Catalogued:28-Sep-2007
This recipe comes from EPCOT's Mitsukoshi Restaurant, located in the Japan pavillion in the World Showcase.

Ingredients

2 ounces ginger root (about ½ cup)

1 medium onion, cut in quarters

3 cups vegetable oil

1 cup rice vinegar

1 ¾ cups soy sauce

1 ½ tbs tomato paste

½ lemon, juiced

1 ¾ cups water


Soak ginger root in cold water for a few minutes to make it easier to remove the outer skin with a peeler. Remove skin and cut into quarters.

Combine all ingredients in a food processor with a steel blade and blend until smooth. If blender will not handle entire recipe, divide in half and blend each half separately and then mix afterward.

Refrigerate and serve on salad.


Bon Appetit!

Monday, September 24, 2007

A Breakfast Quesadilla

I'm not normally a person that enjoys breakfast. I'm not sure why I'm not such a big fan of that meal, and intellectually I know that breakfast is supposed to be the most important meal of the day. Sandra and the kids, on the other hand, love breakfast, and I enjoy cooking eggs for them.

Over the last couple of weekends, I've been making a special breakfast for Sandra (and the kids last weekend when they came for a visit). It's breakfast quesadillas, and the family seems to love them.

This is basically an omelet put into a tortilla with some cheese and a few other ingredients.

Without any further fanfare, I'll pass along the recipe I came up with for this interesting meal.


Breakfast Quesadillas


Source:Larry Gensch
Prep Time:10 minutes
Cook Time:10 minutes
Catalogued:24-Sep-2007

Breakfast quesadillas are, as the name implies, quesadillas that are meant to be eaten for breakfast. They can contain many breakfast food items, depending on your taste.

This recipe is one that Sandra and the kids seemed to enjoy over the past couple of weeks.


Ingredients

1 small cooked chorizo sausage

1 Tbs butter or margarine

1 egg (or equivalent in Egg Beaters), beaten

1 tsp parsley

1 tbs bacon bits (optional)

Salt and pepper

1 large flour tortilla

½ cup shredded cheddar cheese

¼ cup green onions, sliced thin

1 Tbs chopped cilantro (optional)

Few drops of taco sauce (for garnish)

Sour cream (for garnish)


Cut the chorizo in half lengthwise, and then cut into very small diced pieces. Put chopped chorizo into a small frying pan on medium heat and allow chorizo to brown slightly, releasing some of its oils. Remove chorizo from pan and place on absorbent toweling.

Add butter or margarine to the frying pan, and melt, allowing the butter and oils to mix. Add the beaten egg and allow it to start to set. Sprinkle parsley, bacon bits, salt, and pepper into the egg mixture and continue cooking until the eggs set completely, omelet-style. Flip the omelet and cook for about three minutes more. Remove eggs from frying pan onto a plate, and carefully cut three parallel slices so you end up with four strips of eggs.

Warm a round grill pan on a burner at medium-high heat and then add the flour tortilla. After a couple of minutes, flip the tortilla so the warm side is now on top.

It is now time to prepare the quesadilla. You will only be covering one half the tortilla, using the other half to wrap over, taco-style. Add half the cheese, and arrange the strips of the omelet to cover the half of the tortilla. Sprinkle three quarters of the green onions over the cheese and egg, and then add the cooked chorizo and cilantro (if using) over the green onions, and then top with the remaining cheese. Fold the empty half of the tortilla over the filled portion, and place a weight (large frying pan, if you have one) to press the two halves together. Heat for two to three minutes, and then flip the tortilla over. Add the weight on the tortilla again and heat for another two minutes.

Remove quesadilla from grill pan and put on a cutting board. Cut the quesadilla into three or four pieces with a sharp knife. Arrange the quesadilla on a plate with pieces slightly overlapping. Add a few drops of taco sauce, and a dollop of sour cream, and then sprinkle the remaining green onions over everything.

Serve warm.

Other items can be put into these quesadillas, either within the omelet or sprinkled inside the quesadillas. Some suggestions are:
  • A couple of strips of bacon, cooked and crumbled
  • A breakfast sausage, cooked and crumbled
  • Breakfast ham, cut into small cubes
  • A couple of cherry or grape tomatoes, chopped
  • Finely chopped red onion
  • Chopped jalapeno peppers
  • A small avocado, thinly sliced or chopped
  • Dash of chili powder or cumin
  • Minced fresh garlic
  • Dash of Tabasco or other hot sauce


Bon Appetit

Friday, September 14, 2007

Caesar Salad

I can remember the first time I enjoyed Caesar Salad.

I was at a rather nice restaurant called Island Squire in Middle Island, NY (on Long Island, just east of Coram on Middle Country Road—unfortunately, it's been out of business since the mid-1990s) with Sandra. This had to be after Sandra and I got married (1981) but before 1986. We've always known the Island Squire was better than average; it had great food, and on weekends, they had shows (comedy acts, singers, sometimes a play). Later on, the Island Squire would entrench itself in my wife's family's hearts when her brother Craig was hired there as head Chef.

Anyway, before Craig was chef there, I took Sandra out for a nice dinner. I saw in the menu that they had Caesar Salad that they would prepare table-side. I knew that Sandra loved salads, and that we'd both would enjoy watching them prepare the salad. Sandra was unsure, having never tried Caesar Salad before, but was game to have the experience. My only familiarity with Caesar Salad was that it had Romaine lettuce and was served with some sort of vinaigrette dressing.

Not long after we placed our order, the hostess arrived with a rolling table, and she prepared the salad in front of us. Sandra's reaction to the process was priceless. She watched in dismay when the hostess added a raw egg, Worcestershire sauce, and then--horror of horrors--anchovies and yellow mustard. I knew that none of the ingredients I mentioned are things that Sandra enjoys, so I was worried that I'd be eating a "salad for two" by myself. To be fair, there were other things added that we both would definitely enjoy, like garlic, Parmesan cheese, and croutons, but it was those "other ingredients" that had us worried.

When the hostess put generous portions of salad on Sandra's plate, my wife surprised me by trying a bit. Her face brightened up considerably, and in record time, she finished it. Sandra truly enjoyed it!

It was weird; all those things that Sandra didn't like, when mixed together, became a tasty salad!

Not long afterward, I took one of our wedding presents that we received but never used--a wooden salad bowl given to us by Don Verity, my boss when I got married--and reproduced the salad from memory using the same basic ingredients used by the hostess at the Island Squire. Wonder of wonder... my first attempt came out nicely!

I've read that the salad originated in Mexico, either at a hotel in Mexico City or by somebody named "Caesar," but it's now an American tradition. Today, Caesar Salad is one of the more popular salads you'll find on a restaurant menu. You won't find too many places that prepare it table-side like they did at the Island Squire (the only place in New England where we've had it prepared this way was the Prince Grotto, which was run by the now-closed Prince Spaghetti company in Lowell, MA), but you can find it augmented with grilled chicken, shrimp, or other bits of meat to make it into a single meal.

The following recipe is reproduced from one that appeared in the Nashua Telegraph by Marc Bouchon.


Caesar Salad


Source:Marc Bouchard, Nashua Telegraph, August 22, 2007
Catalogued:12-Sep-2007

4 large garlic cloves

2 cups French baguette slices, cut up into ½-inch cubes

3 tablespoons , plus ⅓ cup virgin olive oil

Salt

2 flat anchovies packed in oil (save the oil)

3 tablespoons pasteurized eggs (or 1 large fresh egg)

1 teaspoon Worcestershire sauce

3 tablespoons fresh lemon juice

1 teaspoon Dijon mustard

Freshly ground pepper

2 medium heads Romaine lettuce, trimmed and washed

⅓ cup Parmesan cheese, freshly grated

Preheat oven to 350 degrees. Crush 2 garlic cloves with the side of a knife or with a garlic press. Slice up the baguette, and cut them into ½-inch cubes.

Combine the garlic, 3 tablespoons olive oil, a pinch of salt and the bread cubes in a bowl. Mix until cubes are coated evenly. Spread the coated cubes onto a baking sheet, and bake until the croutons are golden. This should take about 10 minutes.

Crush and mince the remaining 2 garlic cloves. Mince the anchovies to make 11/2 teaspoons paste.

Mix the minced garlic, anchovy paste, any reserved anchovy oil, egg, Worcestershire sauce, lemon juice and mustard in a bowl. Add a healthy pinch of salt and freshly ground black pepper. Whisk until smooth.

Slowly add the remaining ⅓ cup olive oil in a steady stream while constantly whisking again until smooth. Taste the dressing, and add additional ingredients to suit your taste. (Taste hint: If the dressing needs a little extra acid, try 1 or 2 teaspoons red wine vinegar.)

Tear the romaine lettuce into 1- to 2-inch pieces and add them to a large bowl, wooden if you have one. Add half the dressing, toss, add remaining dressing, Parmesan cheese and croutons, and toss again. Serve on chilled plates.

OPTIONAL: Garnish the plates with slices of lemon, slivers of anchovies, extra croutons or toasted pieces of French baguette. Freshly grated Pecorino Romano cheese makes a nice finishing touch on top.

TIP: Make this dressing in larger batches and refrigerate it for later use. It will keep for up to a week if properly made.

Marc Bouchard of Hudson is executive chef at Stellina Restaurant in Watertown, Mass. Address comments or questions to him c/o Lifestyles, The Telegraph, P.O. Box 1008, Nashua, NH 03061.


Bon Appetit!